Wednesday 12 December 2012

Savoury Vegetable Crumble

Hello,

Think crumbles are deserts? Think again! Savoury crumbles can be fabulous, a lovely warming treat for the winter months.

Ingredients


  •  Whatever vegetables you have to hand - I used
    • Onion
    • Celery
    • Mushrooms
    • Leek
    • White cabbage
    • Swede
    • Green leaves
    • Spinach
    • Carrot
  • Handful of red lentils
  • Vegetable oil (not pictured)
  • Mixed dried herbs
  • 500 g Sieved tomatoes (passata)
  • 1.5 oz Vegan hard margarine
  • 3 oz plain white flour
  • 1 oz vegan cheese

Method

  1. Chop up your veggies into strips, cubes, or whatever feels right! Fry these in a large pan with a little vegetable oil until soft.


  1. When the veggies are ready, add the passata and stir in. Throw in a handful of lentils and stir through. Add some water for the lentils to soak up, and leave to simmer. Stir from time to time, and add water as necessary until the lentils are cooked. Add mixed herbs and seasoning to taste.


  1. In the meantime, make your crumble topping. Weigh out the flour in a mixing bowl, and add the margarine in cubes. Rub the flour and butter together until the mixture resembles fine breadcrumbs. Stir in the grated cheese.


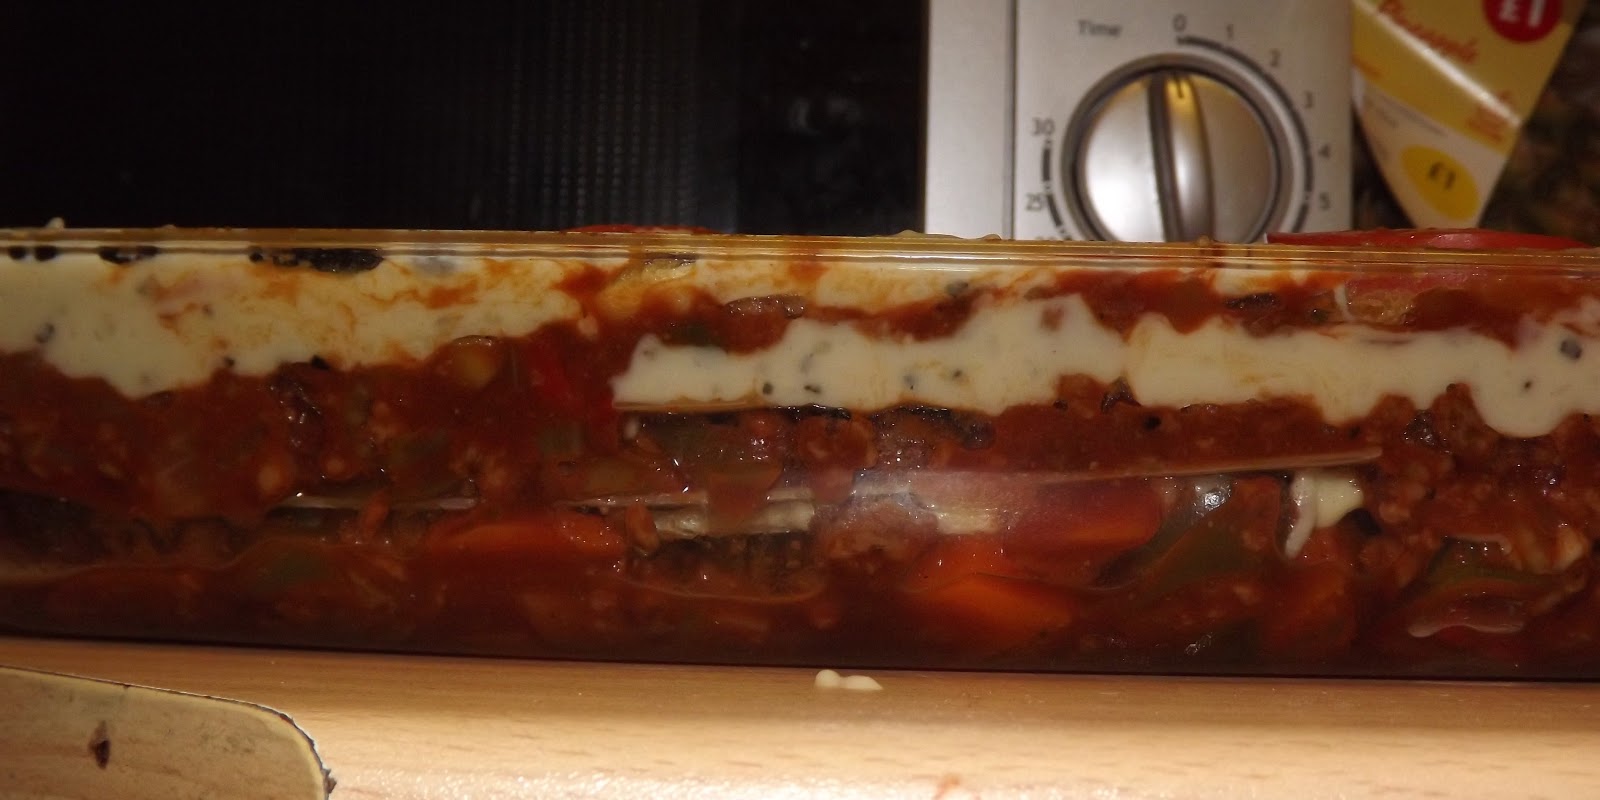
  1. When the lentils are cooked, it's time to put it all together! Tip your veggie mixture into an ovenproof dish and flatten the top with a wooden spoon. Now sprinkle the topping all over the mix evenly. Pop the dish in the oven at Gas Mark 6 for around 15 mins or until the topping is crisp. Don't let the topping brown too much!

The Result


 The topping should be lovely and crisp, and the cheese melts a little and adds a beautiful creamy flavour. If you have some left, it can be stored in it's dish or in tupperware in the fridge for at least 3 days or so.


The crumble can be served as I did with fresh, soft vegan tiger bread. I imagine roast potatoes would also be a good choice!

I hope this recipe brings you much pleasure!

Vegan love,
Callum 


Monday 10 December 2012

Vegan Steak and Onion Pies (I'm back!)

Hello, I'm back!

I've been occupied with some other important stuff recently, but I am back with a vegan vengeance, and I will more than make up for my absence with this recipe! Honestly, I don't exaggerate when I say that this is the best experiment that I've tried since turning vegan 12 months ago. Easy, quick-ish, and just a few ingredients needed. And did I mention totally delicious?

Ingredients


  • Vegan steak strips (I used Fry's Vegetarian Chunky Strips)
  • Soy sauce (optional)
  • Yeast extract (optional, but you'll want to use it!)
  • Vegan gravy granules
  • White onions
  • Vegetable oil
  • Vegetable stock, preferably homemade (see mine here)
  • Shop-bought puff pastry
  • Some suitable foil pie tins

The Method

  1. First, chop your onions into thin strips, then fry your steak strips and onion strips and in a little vegetable oil until lightly browned.


  2. Next, it's gravy time - add to the pan your vegetable stock (enough to almost cover your steak strips), stir in a generous teaspoon of yeast extract and a good splash of soy sauce, then stir in the gravy granules until the desired thickness is reached.


  3. All that's left to do now is to roll out your pastry. Roll it to a thickness of about 3 - 5 mm, then for each pie cut a larger circle to form the base of your pie, and a smaller circle to form the lid. Fill each pie with a decent ladle. Now, using a little water on the end of your finger, wet the edge of the pastry around the filling and pop the lid on top. Pinch all around the outside to seal. When sealed, cut a couple if slits into the lid with a sharp knife to let the steam out during cooking.


  4. Finally, bake! You should follow the instructions from the pastry packet - I baked these at Gas Mark 6 for around 20 mins.

TOP TIP!!!

Don't you hate it when you've cut out all the circles that your rolled-out pastry can fit, but there is still loads of pastry left? Yes, you could re-roll it, but it's never the same! Well, I have a plan to solve this issue - semi-circles!!


If there's no room for a full circle, just cut two semi-circles with a strip of pastry to bind the two together. Then, just lay the two parts of the lid over the top of the pie and, using a finger-full of water, bind the two together with the strip. The same can be done with the base. Problem solved!


The Result


I never thought I would eat a steak pie again, and it's true, I won't, but this is as good (or maybe better!) in my opinion! I marked this one with a "C" for my name - that's another thing you can do with your pastry scraps!


I was a bit naughty - I'm afraid I served up my lovely pie with chip-shop chips and mushy peas. Unhealthy but decadent and totally worth it!

Freezing

The pies can be frozen after assembly but before cooking, but I would recommend that you defrost them before cooking. I tried this and cooking straight from frozen, and although the frozen pie was fine, the defrosted version was definitely superior.


Give them a try, and I hope you enjoy them!

Callum

Sunday 4 November 2012

Vegan Chocolate Chip Cookies

Hello (for the second time today!),

It's Sunday, and clearly I have too little to do, because I'm doing more baking! Chocolate chip cookies are on the agenda today, because I'm yet to find a vegan shop bought cookie which satisfies me.

The original recipe can be found here.

Ingredients 

  • 1 cup plain flour
  • 1 tsp baking powder
  • 1/4 tsp salt
  • 1/2 tsp cinnamon
  • 1/2 cup vegan chocolate chips
  • 1/2 cup sugar
  • 1/4 cup sunflower oil (or any flavourless vegetable oil)
  • 1/2 tsp vanilla essence
  • 1/4 cup water
This is enough to make around 10 medium-large cookies. It would be really easy to double up the recipe if you want more (I would recommend it if you intend to share, they won't last long!).

The Method

  1. Mix your dry ingredients excluding the sugar in a bowl. Make a well in the centre.

  2. In a separate bowl or jug, mix the sugar with the wet ingredients

  3. Pour the wet ingredients into the well in the dry ingredients, and combine thoroughly (but don't overwork it or the gluten will break down in the flour, and this will make the batter a bit bread-like!).

  4. Take a tablespoon of batter at a time, and put blobs onto a lined baking sheet (no greasing necessary).
  5. Bake in a pre-heated oven at Gas Mark 4 for 9 - 15 mins (all ovens are different, but mine took about 11 mins).

The Result


These cookies look quite pale, but I prefer a nice chewy cookie, so I took them out quite early. If you like a tougher, more biscuit-like cookie, you could leave them in a little longer (but not much longer!). Be warned - when the cookies cool, they will harden considerably, so make sure they are soft when they come out of the oven. you may think they are undercooked, but trust me, they will toughen up.
I think these would be really easy to adapt. For example, you could substitute some or all of the chocolate chips with chopped nuts or sultanas. You could also try adding citrus peel, or some cocoa powder to make these double chocolate chip cookies (how exciting!). If you do give that a go, let me know how it works out!

Yours,
Callum

Wholemeal Bread

Hello,

For the first time in years, I thought I would give bread a go. Bread is not difficult to find for vegans, but you still need to be wary, because some of them sneak in little fillers like skimmed milk powder or whey powder. Anyway, there's nothing to beat the smell of homemade bread wafting through your house, or the satisfaction of dipping a hearty chunk of it in your soup.

The bread I made was based on this recipe, but I adapted it to my own taste and the ingredients I had to hand.

Ingredients

  • 500g strong wholemeal flour
  • 1 tbsp dried yeast
  • 0.5 tsp salt
  • 1 tsp sugar
  • 325 ml warm water
  • 1 tbsp olive oil
  • a handful of sunflower seeds

Method

  1. First, prepare the yeast. This should be done according to the instructions on the pack. The yeast that you use will give you an idea of how much yeast you need for the amount of flour you are using and exactly how to prepare it. In my case, I used Allison brand Dried Active Yeast. This needs reactivating by whisking 1 tbsp into a mixture of warm water (150 ml) and sugar (1 tsp). This mix is left in a warm place for about 15 mins until a froth forms on the surface.
  2. In the meantime, mix the flour, salt and the sunflower seeds. Add the yeast and the remaining warm water before chopping together roughly with a knife.While the dough is still a bit lumpy, add the olive oil and mix in well. Now get your hands in and knead it until all the flour has been taken up and the edges of the mixing bowl are fairly clean.
  3. Cover the bowl with a clean tea towel and leave in a warm place for around an hour, or until the dough has doubled in size.
  4. Turn the dough out onto a floured surface. Knead the dough firmly for several minutes - about 10 should be enough. The dough will become less and less sticky as you knead. To see if it's ready, lightly press your thumb into the dough. If it springs back, then the dough is ready.
  5. Shape it however you want - I put most of the dough in a lined loaf tin, but also reserved a little and made two small batons. Coat lightly in flour.
  6. Leave in a warm place for another hour or so.

  7. My little batons, ready to go in the oven after the extra rising


    My loaf, post-rise, ready to hit the oven
  8. Bake in a preheaten oven at Gas Mark 7 for 35 - 40 mins. Readiness check - lightly tap the underside of the loaf/batons. If the sound is hollow, the bread is ready!

The Result

The bread came out beautifully in both forms. This recipe gives quite a dense bread, and it feels just like bread used feel! Although this is delicious, I think next time I'll aim for a lighter loaf. Maybe I'll double the yeast, or leave to rise for longer.


    So I hope you give this a go - the mass-marketed bread is so often full of preservatives and other assorted rubbish. Anyway, the satisfaction factor alone is enough to make this worthwhile!

    Also, this recipe looks really easy to adapt. Try mixing different seeds or grains in with the flour at the start, or even dried fruit - I'm sure it would work a treat!

    PS. Pasty Update!

    Remember when I wrote my pasty recipe and I said that I froze some uncooked? Well, I tried baking the frozen batch in two different ways - straight from frozen, and after defrosting overnight. Both worked fine, but the straight-from-frozen batch lacked the flakiness of the originals. The pastry on the inside was a little soggy, and although it was perfectly palatable (I've certainly had worse), I would recommend deforsting first. The defrosted pastries came out just as good as the fresh ones!

    Yours,
    Callum


Monday 29 October 2012

ASDA

Hello,

I am a regular shopper at ASDA - it's my local supermarket, and is cheap and easy to get to. However, I have learned some things about the supermarket this week which have put me off totally!

First, the recipe for their soya milk (used in this blog to make the Vegan Lasagne) includes Vitamin D3. I was horrified to learn that this is derived from lanolin, which in turn is derived from sheep's wool, making it unsuitable for vegans! Imagine making a soya milk which is not suitable for vegans - appalling!

Secondly, they have started changing some of their recipes which were previously vegan to include milk. Two items which I regularly buy (because I'm a little vegan piggy) are ASDA's dark chocolate and bourbon biscuits, both from the "Chosen by You" range. It's lucky that I check regularly, because last time I went shopping, I found that the choco contains lactose now, and the bourbons have a new part on the packaging, which exclaims proudly "Now with Milk!". So there's two of my favourites scratched off my shopping list!

I'm sure that ASDA think they are doing us a favour by making the items a bit more "luxurious". However, they need to remember that they are excluding vegans, not to mention those with allergies. I have written a letter which I'll post tomorrow complaining about this. If you are an ASDA shopper, even a casual one, I would recommend that you do the same. Other supermarkets are catching up with us by starting to label their products as suitable for vegans, whereas ASDA seem to be taking a step backwards! They won't know that we aren't happy unless we tell them, so dust off your laptop/typewriter/printing press and get writing!

I'll let you know if/when I get a reply.

Plenty of vegan good wishes,
Callum

Thursday 25 October 2012

Vegan Pasties - "Chicken" Curry

Hello everyone,

When I decided to turn vegan, one of the things I really missed was the convenience of being able to grab food on the go in just about any shop. I used to like popping into Greggs to pick up a cheese and onion pasty, but now I have to be a bit more creative when I'm out. However, even better than creative is well prepared. Just because I'm making a stance against animal abuse, it doesn't mean I never want to eat a pasty again! Today's post shows you how easy it is to make your own delicious pasties at home, with only a few inexpensive ingredients and about half an hour.


Ingredients


Only a few simple ingredients needed here - why complicate things?

  • Ready-made vegan puff pastry
  • Soya chicken style pieces
  • Curry sauce of your choice
  • Chilli sauce/powder/fresh chillies (optional)
  • Frozen peas (not pictured)
  • A little soya milk (not pictured)
  • Vegetable oil (not pictured)
I know, ready-made pastry is a bit of a cheat, but I've made puff pastry from scratch before, and it's an awful lot of effort. It's surprisingly easy to find vegan puff pastry, because all but the luxury brands tend to use vegetable margarine instead of butter. I'm using Asda own brand, but I know that there are other possibilities.

The curry sauce I'm using gives a sort of yellow Chinese-takeaway-style curry sauce, but you could use any kind of indian style sauce if you wanted. I'm also adding a bit of chilli for spice, but if you don't like the hot stuff, just omit it.

The Filling

Put about a tablespoon of vegetable oil in a frying pan, and fry the chicken until it just starts to brown slightly. Add the frozen peas, and fry until they are hot through. Now add the sauce, following the instructions on the pack - for my sauce, I added a heaped tablespoon to the pan, stirred it around for about 30 seconds, then added half a cup of boiling water. Bear in mind you don't need much sauce. It should just be a coating - too much sauce will make it difficult to contain the curry in a pasty.

Assembly

Roll out the pastry until it's at the required thickness - about 2-4 mm seems about right. Cut the pastry into rectangles - I got 6 out of the packet. Take about two heaped tablespoons of filling, and put it on one half of the rectangle, leaving space around the edges to seal the pastry. Use the back of the spoon to flatten the filling as much as possible. Using a pastry brush or a finger, cover the edges of the pastry in a little soya milk. Now fold over the pastry and press lightly all around the edges to seal. Using a thumb and forefinger, crimp the edges by squeezing the pastry together all oround the edges. You can cover the outside of the pastry in a little soya milk for a shiny finish. Finally, use a sharp knife to cut a couple of slits in the top of the pasty. This lets steam out from the filling.


Now, simply bake the pasties on a lightly floured baking tray for 15-20 mins or until golden brown (these are guidelines - always consult the instructions on your pastry!).

The Result


This really is a dish to warm your soul - oven-fresh pasties, easy to make and not time-consuming. Great to pack when you're going out or to take to work for lunch.

The beauty is that you don't even need to make a bespoke filling, because you can throw almost anything into a pasty. Made a curry and have a few spoonfuls left over? Bake it in a pasty! I've also used leftover mexican-style bean chilli in the past, and it was a roaring success. I also tried sosmix to make a kind of sausage roll, by mixing the powder as per the instructions then putting it in the pastry uncooked - it cooks very well in the pastry. Try it sometime!

I've also frozen some of the pasties uncooked, and I'm hoping they should still cook well after freezing. When I cook them, I'll update you on how they go!

I hope you enjoy giving this a try yourself - I don't miss Greggs at all anymore, what they sell is no substitute for what you can do yourself!

Watch this space for more ideas and recipes soon!

Yours,
Callum

Sunday 21 October 2012

Vegetable Stock

Hello,

No pictures or recipes today, just a word on stocks. I use vegetable stocks at least once or twice a week in my cooking, most often as a base for soups and gravies, but it can also be used instead of water when you boil rice, beans etc. As a vegan it can occasionally be quite hard to get ready-made stock cubes, as they sometimes (often) contain milk products, or in some cases, meat products! I heard a rumour that some Knorr vegetable stocks contain flavouring from beef, of all things, but don't quote me on that! Even where I can find vegan stock cubes, I really prefer to avoid them due to the high levels of salt, and the flavours are often so strong that you can barely taste whatever you have cooked with the stock.

So where does this leave us? Well, I make my own stock, and it's not difficult or even time-consuming.

My method is this - whenever I'm preparing food with vegetables, I take the trimmings and peelings and put them in a sandwich bag. I then put the bag in the freezer. I keep adding to this bag every time I cook until it's full or I need a stock. Then, I simply empty the bag into boiling water while I'm in the kitchen cooking something else, and let it boil furiously for as long as can! That's it!

After I've drained the stock, I sometimes let it boil a bit longer to reduce it if there is too much liquid. After that, I let it cool and either use it or put it in the freezer. Easy, healthy stock available whenever I want it!

I've recently started doing this in a pressure cooker (my new favourite toy!) because I hear that this helps to retain more vitamins in the stock.

My favourite things to put in are peelings and trimmings from carrots, courgettes, celery and mushrooms, because these give a very earthy and flavoursome stock (especially the mushrooms). I avoid potato peelings, because these are a bit too starchy for my liking. What you put into your stock is entirely a matter of personal taste, or may be affected by what you intend to do with a stock. For example, a delicately flavoured soup requires a delicate stock, so you may wish to avoid fennel, or other strongly flavoured items.

So, never buy stock cubes again! There is truly no substitute for making your own custom stock - it's healthier, tastes better and gives you that little bit extra satisfaction!

Yours,
Callum

PS. More recipes coming soon - I just bought a powdered egg substitute for the first time, so I feel a bit of baking coming on to try it out!

Wednesday 10 October 2012

Vegan Lasagne

Hello friends,

Today's offering is a lovely vegan lasagne, which uses soya mince and plenty of vegetables for the sauce, and also features a vegan bechamel (white) sauce. I've never tried the bechamel sauce vegan-style before, but it went well - I can think of some improvements for next time, though!

Ingredients


We have:
  • Vegan soya mince (about half a bag)
  • 3 small onions
  • half a courgette
  • 1 medium green pepper
  • 1.5 sticks of celery, peeled
  • 1 small tomato
  • 1 medium carrot
  • 3 sundried tomatoes
  • 6 garlic-stuffed olives
  • 1 carton passata
  • Dried mixed herbs
  • Salt & pepper
  • Unsweetened soya milk
  • Plain flour
  • Olive oil
  • Vegetable oil
  • Pasta sheets (which I forgot to picture!)
Serves 4

So the recipe consists for 2 parts, really. That's the mincey tomato sauce, and the becamel sauce, which will eventually be layered up together between pasta sheets to make the lasagne.

Tomato sauce

This part is quite easy, it's just throwing stuff together and cooking it!

Ready for the pan


  1. Chop up the courgette, onions, celery, pepper, carrot, olives and sundried tomatoes into small pieces.
  2. Over a medium heat in a large pan, heat a spot of vegetable oil. Throw in your chopped ingredients. Stir.
  3. After 5 mins or so when the veggies are warm and coated in oil, add the soya mince. Stir from time to time.
  4. When all ingredients are soft, add the passata. Stir in and bring to the boil, then cover and simmer for around 10 mins. Season to taste with salt, pepper and dried mixed herbs (actually I used soy sauce instead of salt - try it, you won't regret it!).
My cooked ingredients, before adding the passata


Easy, right? If you're not a fan of fake meat, you can easily use lentils instead and it's just as good. Or, just use vegetables (but I would recommend throwing in chickpeas for protein).

Bechamel Sauce

I found this simple recipe on the internet, but I'm sorry to say I can't remember where, otherwise I would reference it! 

The recipe didn't work perfectly for me, but I'll give it to you as I found it, then I'll tell you how I would change it.

  1. On a low heat, warm up a quarter cup (sorry about American measurements, but I quite like them!) of olive oil.
  2. Add 2 tablespoons of plain flour, and whisk to dissolve.
  3. When the mixture starts to bubble, add 2.5 cups of soy milk. Whisk until thick.
That all sounds really easy, but it didn't quite float my boat. Firstly, my sauce didn't thicken very well, so I added 4 tbsp more flour at the end (bringing my total to 6 tbsp), which ended up being too much! If I was doing this recipe again, I would use 4 tbsp flour in total at the start. Also, I prefer the traditional method of adding the milk gradually bit by bit, rather than just throwing it all in. Finally, I like to season the sauce at the end. Those would be my amendments. Other than that, it's a great recipe, uncomplicated and effective.

I'd like to try it with some cheese melted into the sauce at the end, but the flavour/meltability of vegan cheese is hit-and-miss. Maybe someone can recommend a good one to me?

Put it all together

Now it's the fun part! I used pasta sheets which don't need precooking, but make sure you follow the advice on the box.

  1. Coat the bottom of a flat ovenproof dish with as thin a layer as possible of the tomato sauce. 
  2. Line this tomato sauce layer with pasta sheets, being careful not to overlap them if they aren't precooked, otherwise the overlapped parts will be chewy!
  3. Cover the pasta sheets in a layer of bechamel sauce. 
  4. Repeat until you run out of space/ingredients! I like to finish with bechamel sauce on top.
  5. For decoration, slice a tomato and put the slices on top of the final layer of bechamel sauce.
  6. Bake in the oven (I used gas mark 8).
Ready for the oven
Lasagne layers!

The Result


After 10 - 15 mins in the oven
Served up "pub-style" with roasted potatoes and a fresh side salad, yum!

As with almost everything I cook, I don't use a hard-and-fast recipe. I use whatever vegetables I have and think would be nice. Unfortunately, I ran out of garlic, which is usually a lasagne staple ingredient for me! Apart from that, it's up to you what to use. I also like to serve up my lasagne with homemade garlic bread, which is likely to become a future recipe on this blog, because it's one of my favourites!

I hope you find this useful. In the quest for exciting and tasty food with no ethical compromise, I think this is a firm winner!

Yours,
Callum

Tuesday 9 October 2012

My first food post

Introduction

Hello and Welcome!

Hello, and welcome to my brand new blog on all things vegan!

My name is Callum, and I've been a vegan for around 9 months, after being vegetarian for 7 years before that. Although it hasn't always been 100% smooth, I have loved the transition to a vegan lifestyle. I've learned so much about what it means to be a vegan, and how to do it properly without missing anything from my diet.

There are lots of reasons why I've finally decided to lose my blogging virginity and write this.

The first is to document some of the food I cook and eat, and to share the recipes for them. I would also like to talk about any restaurants I go to, and how good they are at looking after vegans. The plan is to upload loads of pictures of lovely vegan food, accompanied by easy-to-follow recipes (if it's something I made myself!).

Secondly, I really want to blow the stereotype that vegans live off boiled vegetables! Nothing wrong with boiled vegetables, of course, but I love food, and I like my food to be exciting, tasty and full of flavour! There's no reason for me to lose that just because I decided to be a vegan!

Finally, I hope that this blog will encourage you to consider veganism if you haven't already. The last thing I want this blog to be is preachy, but I will occasionally mention animal rights issues - after all, that's why I decided to go vegan! My advice is to non-vegans is to approach veganism with an open mind - I ask nothing more than that. The more I found out about veganism and what it means, the more I can't believe I didn't make the change years ago. Out of all the alternatives, it makes the most sense to me, and I'm sure it would make sense to a lot of people if they are shown that it is ultimately about caring, both for animals and mother nature (that's true for me anyway!).

Comments and questions on anything I write here are very welcome!

So, I hope that you enjoy the things I write here, that you find them interesting and fun, and that you take something good away from it.

Watch this space for the first food post later today!